The 30-second habit that wins buildup and crown appeals
A buildup denied as "inclusive" usually comes down to one question: how much tooth was actually left? Four quick intraoral photos answer it better than any narrative can. Here's exactly what to capture.
If you've ever had a core buildup (D2950) or a crown denied as "inclusive" or "not medically necessary," you know the frustration. You were standing right there. You saw how broken down that tooth was. The reviewer didn't.
Here's what we see over and over when we work appeals: the offices that win are the ones with intraoral photos. An x-ray often can't show how much tooth structure was actually lost once the decay was removed. A quick photo series shows the reviewer exactly what you saw — and it frequently makes the difference between a denial that sticks and a claim that gets paid.
The four photos to take — about 30 seconds chairside
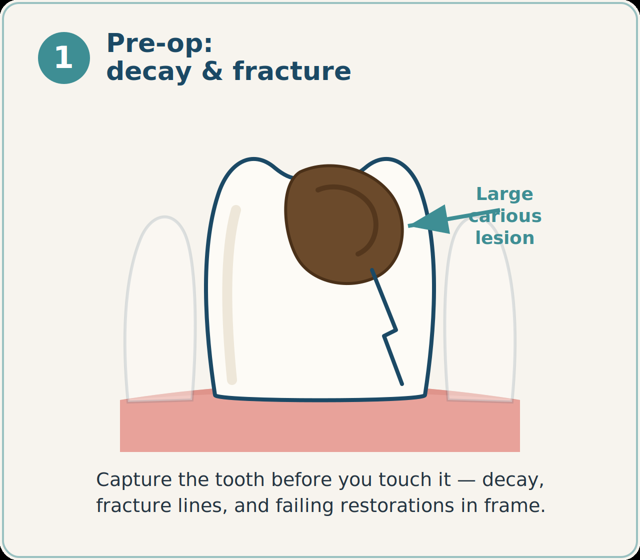
1. Pre-op: what you're starting with
The tooth before you touch it, showing the carious lesion, the fracture line, or the failing restoration. This establishes the baseline the reviewer will compare everything else against.
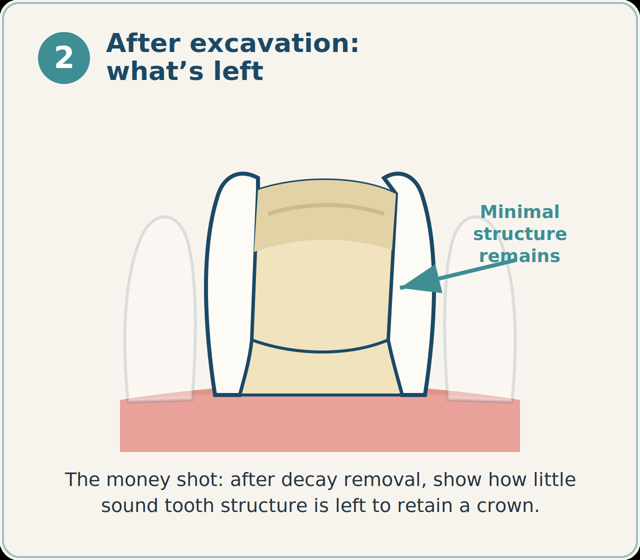
2. After excavation: what's left
This is the money shot. Once the decay is removed, show how little sound tooth structure remains to retain a crown. It is the photo reviewers care about most, and it is the one most likely to get skipped in a busy operatory.
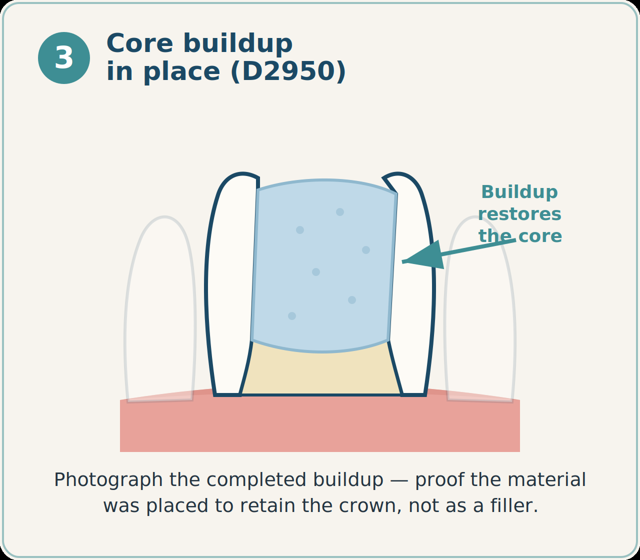
3. The buildup in place
Core buildup material placed and restoring the missing structure. This documents that the buildup did real work rebuilding the tooth — it was not a liner, a base, or something reasonably bundled into the crown prep.
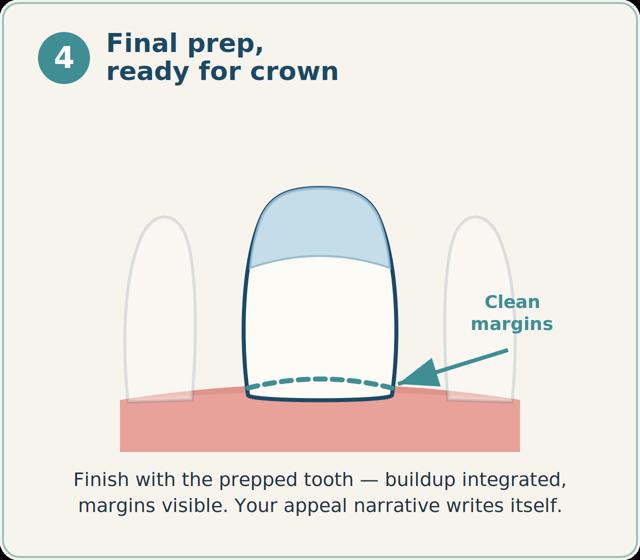
4. The final prep
The finished crown prep with the buildup integrated and clean margins. It closes the story: this is what the crown is being seated on.
Why this works
Buildup denials almost always hinge on a single question: was the buildup necessary to retain the crown, or was it part of the crown preparation? That is a question about how much tooth was left — and a photograph answers it in a way a narrative alone cannot. Pair the photo series with a strong clinical narrative and you have the most persuasive appeal package you can send. We have watched it flip denials that a narrative alone never would have.
Make it stick in your office
- Take the series at every buildup and crown visit — before you need it, not after the denial arrives.
- Photo #2, after excavation, is the one reviewers care about most. Do not skip it.
- Save the photos to the patient chart with the date of service and the tooth number.
- When you can, attach the photos to the initial claim. The best appeal is the denial that never happens.
Start this week
Pick your next scheduled buildup and crown case and take the four photos. It costs about thirty seconds chairside. If that case is ever denied, you will already have the strongest piece of evidence in the file — and if it is not denied, you have lost nothing.
Fighting a stubborn denial right now, or want help building this into your team's workflow? Reach out to Atlantic Dental Consulting — we are happy to help.
Want this handled for you?
Book a free 30-minute consultation and we'll look at where your billing stands — no pressure, no commitments.
Prefer to write first? Email brittany@atlanticdentalconsulting.com